
Night Vision Guide: How It Works, Types, Generations & Buying Advice
A comprehensive, brand-neutral resource for understanding night vision technology, choosing the right device format, and using it effectively in the field.
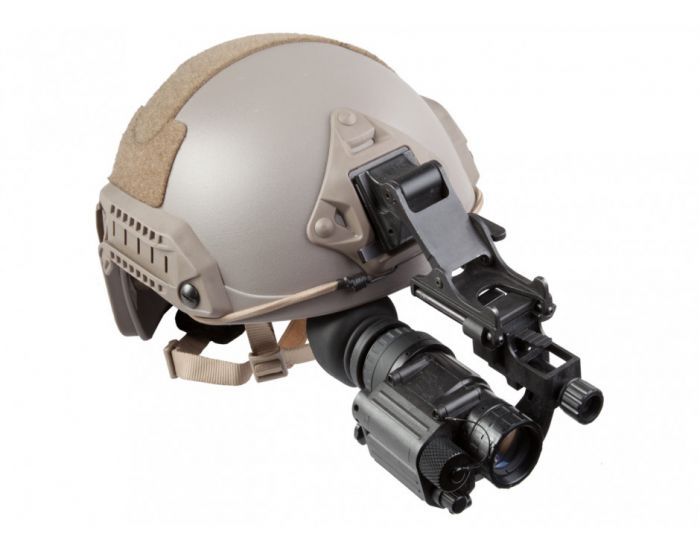
What Is Night Vision?
Quick answer:
Night vision is a group of technologies that help a user see when visible light is limited. Traditional image-intensification night vision collects available visible and near-infrared light, converts that light into electrons, amplifies the electron signal, and converts it back into a visible image. Some systems can also use an infrared illuminator when natural ambient light is insufficient. Thermal imaging is different: it creates an image from differences in emitted thermal energy rather than amplified reflected light.
That distinction matters because “night vision” is often used loosely to describe any device that helps you see after dark. In practical use, however, analog image-intensifier night vision, digital night vision, active infrared systems, and thermal imaging solve different problems. A good buying decision starts by understanding the job you need the device to perform; navigation, observation, identification, hands-free movement, long-range viewing, or integration with a daytime optic.
This guide is designed as a central resource. It explains the technology first, then the device formats, performance factors, practical field considerations, and the questions buyers should ask before spending money on a night vision system.
How Night Vision Works
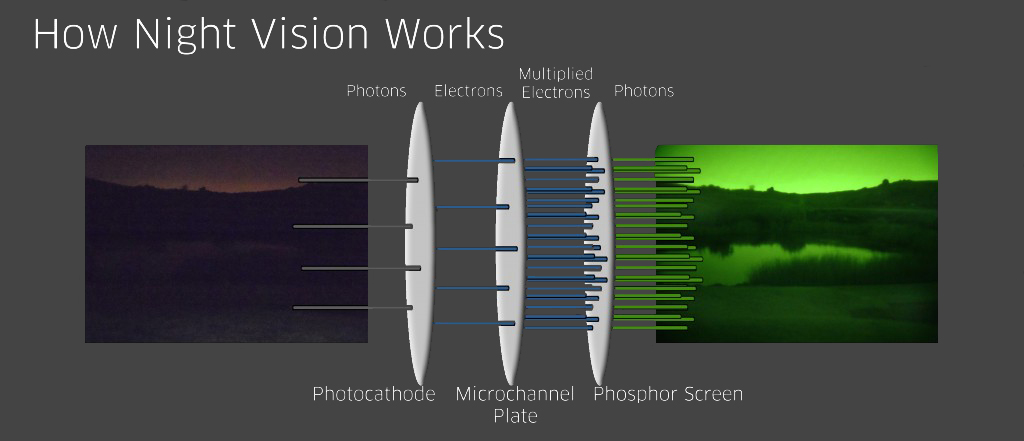
Image-intensification night vision does not simply “turn darkness into daylight.” It works with light that is already present in the environment. The U.S. Army describes the process as a sequence in which scene light enters the objective lens, photons strike the photocathode and release electrons, a microchannel plate multiplies those electrons, and a phosphor screen converts the amplified signal back into visible light for the user to view.
That distinction matters because “night vision” is often used loosely to describe any device that helps you see after dark. In practical use, however, analog image-intensifier night vision, digital night vision, active infrared systems, and thermal imaging solve different problems. A good buying decision starts by understanding the job you need the device to perform; navigation, observation, identification, hands-free movement, long-range viewing, or integration with a daytime optic.
The image intensifier tube
- Objective lens: collects available light from the scene and focuses it into the device.
- Photocathode: converts incoming photons into electrons.
- Microchannel plate (MCP): multiplies the electrons, increasing the strength of the signal.
- Phosphor screen: converts the amplified electron pattern into a visible image.
- Eyepiece optics: present that intensified image to the user and allow focus adjustment.
The quality of the final image depends on more than the generation label printed on the box. Tube performance, optical quality, ambient illumination, focus, atmospheric conditions, device configuration, and the user’s familiarity with the system all affect what can actually be seen.
What happens when there is almost no ambient light?
Image intensifiers need photons to amplify. In extremely dark environments; inside a structure with no light leakage, under heavy canopy, or on very dark nights. An infrared illuminator can supply near-infrared light that the device can see even though the beam may be invisible to the unaided human eye. Think of it as supplemental illumination for the night vision system rather than a substitute for the intensifier itself.
IR is useful, but it changes the operating equation. Other night vision users may be able to see an active IR source, and too much illumination can wash out nearby detail or create reflections. The practical rule is simple: use only as much supplemental IR as the scene requires.
Night Vision vs. Thermal Imaging: What Is the Difference?
Night vision and thermal imaging are complementary technologies, not interchangeable terms. Image-intensification systems form an image from reflected visible and near-infrared light. Thermal imagers detect differences in emitted thermal energy. Because the underlying physics are different, the two technologies excel at different tasks.
| Factor | Image-Intensifier Night Vision | Thermal Imaging | Practical Takeaway |
|---|---|---|---|
| Primary input | Reflected visible and near-IR light | Differences in emitted thermal energy | Choose based on whether you need visual scene detail or heat-based detection. |
| Complete darkness | May require supplemental IR | Can operate without visible light | Thermal has an inherent advantage when there is no usable scene light. |
| Scene detail | Often preserves familiar shapes, terrain and visual context | Highlights thermal contrast rather than natural appearance | Night vision can be better for navigating and interpreting the scene. |
| Detection | Depends heavily on illumination and contrast | Excellent when a warm subject contrasts with the background | Thermal is often strong for quickly finding living subjects or heat sources. |
| Identification | Can provide recognizable visual detail when conditions support it | Depends on range, thermal contrast, resolution and target detail | Do not assume detection equals positive identification with either technology. |
In advanced systems, image intensification and thermal sensing can also be fused. The U.S. Army’s Enhanced Night Vision Goggle Binocular (ENVG-B), for example, combines white-phosphor image intensification with a thermal overlay. That is a useful reminder that the question is not always “thermal or night vision.” In some applications, the best answer is a system that combines the strengths of both.
Types of Night Vision Devices
The right format matters as much as the tube or sensor. A device that is excellent for stationary observation may be a poor choice for hands-free movement. Before comparing model specifications, decide how the system will actually be used.
Night vision monoculars
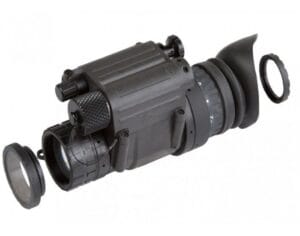
A monocular uses a single viewing channel. The format is popular because it can be compact, relatively light, and adaptable to handheld or head-mounted observation. Keeping one eye unaided can also preserve some natural vision and peripheral awareness. The tradeoff is that depth perception and visual comfort may differ from a dual-tube system, particularly during extended movement.
Night vision goggles and binocular systems
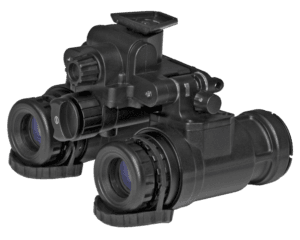
Dual-tube binocular night vision presents an intensified image to both eyes. A 2024 U.S. Department of Homeland Security assessment defines binocular systems as having two eyepieces, two image intensifier tubes, and two objective lenses, and notes their depth-perception advantage over monocular and bi-ocular configurations. For hands-free movement, navigation, and extended observation, that more natural two-eye presentation is a major reason many professional users prefer binocular systems.
The cost is added weight, complexity, and typically a higher purchase price. A dual-tube system is not automatically “better” for every user; it is better when the use case benefits from both eyes receiving an intensified image.
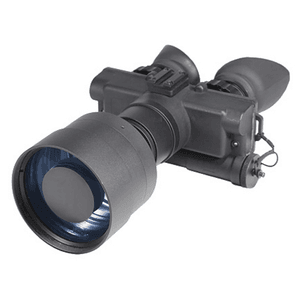
Night vision binoculars for observation
Not every binocular-style device is intended for helmet mounting. Handheld observation binoculars can make sense for wildlife viewing, property observation, camping, security, and other situations where the user is largely stationary. Magnification may be useful for detail at distance, but it reduces field of view and makes movement more difficult. For scanning while walking, 1x systems generally preserve spatial awareness better than magnified optics.
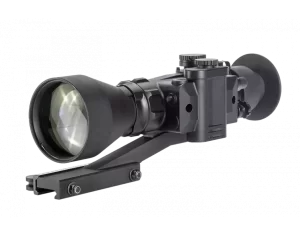
Dedicated night vision scopes
A dedicated night vision riflescope integrates low-light viewing and an aiming system into one optic. This can be a straightforward solution when the firearm is primarily configured for nighttime use. Buyers should pay close attention to recoil rating, mounting system, eye relief, reticle design, focus range, supplemental IR requirements, and the legal rules governing nighttime hunting in their jurisdiction.
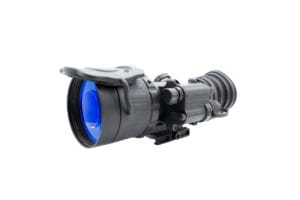
Night vision clip-ons
A front-mounted night vision clip-on is designed to work ahead of a compatible daytime riflescope. The attraction is versatility: the day optic remains in place, while the clip-on adds low-light capability when needed. Properly engineered clip-ons are designed to maintain the established sighting relationship, but performance depends on optical alignment, mounting repeatability, the day scope’s magnification range, tube quality, and available light. Compatibility should always be verified with the manufacturer rather than assumed.
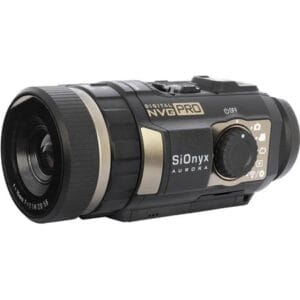
Digital night vision
Digital night vision uses an electronic image sensor and display instead of a traditional direct-view image intensifier tube. Digital systems can offer features such as recording, on-screen menus, and daytime-safe operation, but their low-light performance, latency, battery consumption, and dependence on infrared illumination vary widely. Digital night vision belongs in the same buying conversation, but it should not be evaluated as if it were simply a lower-cost version of analog image intensification.
Night Vision Generations and Tube Specifications
Generation labels remain a convenient way to describe broad stages of image-intensifier development, but they should not be the only basis for choosing a device. Even tubes within the same general category can differ in measurable performance. Serious buyers should look at the actual data supplied for the tube or device whenever those specifications are available.
Gen 1, Gen 2 and Gen 3 in practical terms
Gen 1 represents earlier image-intensifier technology and is generally associated with lower performance than modern professional systems. Gen 2 introduced the microchannel plate architecture that substantially improved electron multiplication. Modern Gen 3 systems use improved materials and production methods; the DHS notes that Gen-3 tubes provide enhanced resolution, sensitivity, and detection range compared with previous generations. For a buyer, however, the useful question is not simply “What generation is it?” but “How well does this specific tube perform in the conditions where I will use it?”
Key image-intensifier specifications worth understanding
- Signal-to-noise ratio (SNR): Describes the usable image signal relative to background noise. In very low light, stronger SNR generally supports a cleaner, more interpretable image.
- Resolution: Often expressed in line pairs per millimeter (lp/mm). It describes the tube’s ability to distinguish fine detail under specified test conditions.
- Figure of Merit (FOM): A commonly used composite value calculated from resolution multiplied by SNR. It is useful for comparison, but it does not capture every aspect of tube behavior.
- Equivalent Background Input (EBI): Relates to the tube’s background output when scene illumination is extremely low. It is one factor affecting very-dark-scene performance.
- Halo: Describes the bright area that can form around intense point light sources. Smaller halo can preserve more usable detail around lights.
- Gain: Describes the degree of amplification. Manual-gain systems allow the user to reduce or increase image brightness to match conditions.
- Blemishes / spots: Image-intensifier tubes may show small dark spots or cosmetic imperfections. Their significance depends on size, location, quantity, and the acceptance standard applied to the tube.
- The key point: do not buy by FOM, phosphor color, or generation alone. A well-matched system is the combination of tube performance, quality optics, a reliable housing, good ergonomics, and a configuration suited to the intended task.
White phosphor vs. green phosphor
The phosphor screen determines how the intensified image is presented to the eye. Green phosphor is the traditional look most people associate with night vision. White phosphor presents the scene in grayscale. Current U.S. military programs have adopted white-phosphor systems for a number of applications, but phosphor color should not be treated as a complete performance specification. Tube quality and measurable performance still matter more than color alone.
How Far Can Night Vision See?
There is no universal “night vision range.” Any fixed distance stated without context can be misleading. A device may detect the presence of an object at a distance where the user cannot reliably recognize what it is, and recognition may occur well before positive identification. The useful range changes from one night to the next.
What controls usable range?
- Ambient light: moon phase, starlight, nearby artificial light, canopy cover, and shadows change how much scene light is available.
- Atmospheric conditions: fog, rain, humidity, dust, and haze can reduce contrast and scatter light.
- Optical quality and aperture: the device must efficiently collect and transmit the light that is available.
- Tube performance: sensitivity, SNR, resolution, gain, and other tube characteristics affect the image under low illumination.
- Magnification and field of view: more magnification can help with distant detail but reduces field of view and makes searching more difficult.
- IR illumination: supplemental IR can extend usable performance in dark conditions, but the useful result depends on illuminator power, beam quality, target reflectivity, and environment.
- Target size and contrast: a large object against a simple background is easier to detect than a small, low-contrast subject in clutter.
For that reason, evaluate manufacturer distance claims carefully. Ask whether the number refers to detection, recognition, identification, or an aiming application, and under what illumination and weather conditions the claim was established.
How to Choose the Right Night Vision Device
Start with the task, not the specification sheet. The most expensive system can still be the wrong system if its form factor does not match how you intend to use it.
1. Define the primary job
Navigation and hands-free movement favor different configurations than stationary observation or use with a daytime optic. Decide what the device must do most often.
2. Decide whether detection or visual scene detail matters more
If quickly finding heat-emitting subjects is the priority, thermal deserves serious consideration. If natural scene context, navigation, or visual detail is central, image intensification may be the better tool.
3. Determine whether you need one eye or two
A monocular can be lighter and more versatile. A dual-tube binocular system can improve depth perception and comfort for extended movement.
4. Evaluate the tube—not just the generation label
Compare SNR, resolution, FOM, EBI, halo, gain capability, and blemish specifications when data is available.
5. Treat optics and ergonomics as performance features
Focus controls, eye relief, field of view, housing weight, balance, mounting geometry, battery placement, and control layout directly influence how well the device works in the field.
6. Plan for the environment
Open terrain, heavy woods, indoor structures, humidity, dust, artificial lighting, and temperature all change what the system needs to handle.
7. Verify mounting and compatibility
Helmet mounts, bridges, weapon mounts, day scopes, rails, and accessories are not universally compatible. Confirm the complete system before buying individual components.
8. Budget for the complete setup
A head-mounted system may also require a helmet or head harness, shroud, mount, retention, counterweight, batteries, and storage. A clip-on may require compatible day glass and mounting space.
Practical Night Vision Field Tips
Good equipment does not replace familiarity. Night vision changes how you perceive depth, contrast, shadows, and bright light. Practice with the device in controlled conditions before relying on it for a demanding nighttime task.
Focus before you need it: Learn the objective-focus and diopter controls and practice moving between near and far objects. A technically excellent tube is not useful if the image is out of focus.
Manage supplemental IR: Use the lowest amount of IR that provides the detail you need. Excess illumination can create glare and wash out nearby surfaces.
Expect mixed-light environments: Streetlights, vehicle lights, porch lights, fire, reflective surfaces, and sudden illumination can change the image quickly. Modern systems may include protective or gain-control features, but the user still needs to understand how the device behaves.
Protect the optics: Keep lenses clean, use appropriate caps and cases, and avoid unnecessary exposure to abrasive dust or moisture. Follow the manufacturer’s maintenance guidance.
Manage batteries deliberately: Start with known-good batteries, carry spares, and understand the device’s battery indicator and external-power options before going into the field.
Train for depth and distance: Night vision can alter depth cues, particularly with a monocular. Slow down on unfamiliar terrain and practice judging obstacles and distances.
Understand active signatures: An IR illuminator may be invisible to the naked eye, but other night vision devices can detect it. This matters in professional, training, and security contexts.
Know the law before using night vision for hunting: Hunting rules vary by state, species, season, and equipment type. Check current regulations from the responsible state fish and wildlife agency before hunting at night or using electronic optics.
Common Night Vision Applications
Hunting and predator control
Where lawful, night vision can support navigation, observation, target assessment, and nighttime hunting. The device should be selected around terrain and method: head-mounted systems prioritize movement, magnified observation devices prioritize detail, and dedicated or clip-on weapon systems prioritize integration with a sighting platform. Local laws take priority over equipment capability.
Wildlife observation
Night vision can reveal nocturnal behavior that is difficult to observe with the unaided eye. Handheld monoculars and binoculars are particularly practical when the goal is observation rather than movement. Supplemental IR can help in darker environments, but users should avoid disturbing wildlife with visible light or unnecessary proximity.
Camping and navigation
A head-mounted or handheld 1x system can help users move through dark terrain while maintaining a wider sense of the surrounding environment. Weight, balance, field of view, close-focus capability, and battery management become more important than long-range magnification.
Security, law enforcement and professional use
Professional users may prioritize ruggedness, hands-free operation, low-light image quality, equipment compatibility, and the ability to function around mixed artificial lighting. Training, agency policy, and operational requirements should drive equipment selection.
Common Night Vision Buying Mistakes
- Buying the highest advertised generation without reviewing actual tube specifications.
- Treating thermal imaging and image-intensifier night vision as the same technology.
- Assuming the longest advertised range will translate directly to positive identification in field conditions.
- Choosing too much magnification for an application that requires movement and situational awareness.
- Ignoring total system weight once mounts, helmets, bridges, batteries, and accessories are added.
- Assuming all clip-ons work with every day scope or magnification range.
- Failing to budget for training, batteries, mounts, protective storage, and other support equipment.
- Buying around internet specifications instead of the real task the device needs to perform.
Final Takeaway: Buy for the Mission, Not the Marketing
Night vision is easiest to understand when you stop treating it as a single product category and start treating it as a set of tools. Image intensifiers, digital systems, thermal imagers, monoculars, binoculars, goggles, scopes, and clip-ons each solve a different combination of problems.
For most buyers, the best path is to define the application first, determine whether the priority is movement, observation, detection, identification, or sight integration, and then evaluate the complete system—not just a generation label or one headline specification. That approach leads to better equipment choices and creates a foundation for learning the more specialized parts of night vision technology.
From here, the logical next step is to go deeper into the category that matches your use: night vision vs. thermal, monoculars vs. binoculars, image-intensifier tube specifications, infrared illuminators, night vision clip-ons, and practical field setup.